Web sites with only a few pages that rarely need updating are prime candidates for publishing as static sites with GitHub Pages. (This post was specifically written for my DCI 110: Web Programming for Non-programmers class.)
Definitions
Static site: The contents of a site are stored in HTML files on a server.
Static site generator: Software for creating a static site, usually from content written in Markdown rather than directly in HTML.
Dynamic site: The contents of a site are stored in a database on a server and the pages are generated dynamically every time the page is requested.
GitHub Pages: Website hosting directly from a repository on GitHub.
A Bit of Web History
In the first years of the Web, back in the early 1990s, all Web sites were static. Soon, though, we realized that databases on the server provided an efficient way to store and maintain content as sites became larger. Through code, often PHP or even perl in the 1990s, a Web page would be generated on-the-fly (i.e., dynamically) each time a user accessed the site. Dynamic sites became more popular as tools developed in the first decade of the Web. In the early 2000s, as blogging exploded as a form of site development by people not technically inclined, blogging tools such as WordPress fostered the growing dominance of database-driven sites powered by various types of content management systems.
As WordPress grew in complexity and came more vulnerable to hacking, some people sought alternatives. Static site generators emerged as tools that recalled the early days of the Web in which sites were comprised just of a set of HTML files (but now with CSS and JS files). Static site generators have a bit of a learning curve, but are worthwhile in many cases. GitHub Pages has the option of using a well-known static site generator, Jekyll. Note that you don’t need a static site generator in order to have a static site. For a very small site, hand-edited HTML files work just as well.
So for this assignment, we’ll be using the option of GitHub Pages to publish your HTML, CSS, and JS files without the use of Jekyll.
Learning Outcomes
Through this tutorial, you will learn:
- to upload a copy of your local files (i.e., on your laptop) to a server (i.e., GitHub)
- to utilize GitHub Desktop for pushing files to GitHub
- to publish a static site via GitHub Pages
Project files & static content
On your local machine, you should have created a folder for this assignment that contains the html file you’re working on and a subfolder for your CSS stylesheet. To make your life easier: you should name your HTML file index.html. Your directory for this assignment should look something like the following:
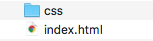
You should also have folders for images and js. Your assignment directory should have a simple name with no spaces, something like termProject.
Create a new repository with existing code in GitHub Desktop
There are several ways of creating a repository in GitHub. In many cases, you might create the repository first on GitHub. That’s a good approach if you’re just starting a project or if you’re forking an existing repository on GitHub. This tutorial assumes that you already have some code in a directory, and you want to turn that directory into a GitHub repository.
So that we can avoid using the complexities of the command line, we are going to use the free GitHub Desktop app.
Install the app if you have not already. After the app is installed, start the app and then walk through the steps for logging into your GitHub account. You’ll only have to do this once, when you first install the app.
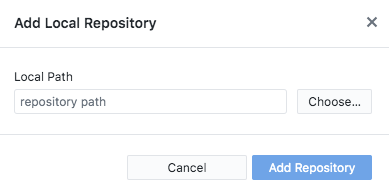
In GitHub Desktop, select File > Add Local Repository from the menu. You should see a window like the following:
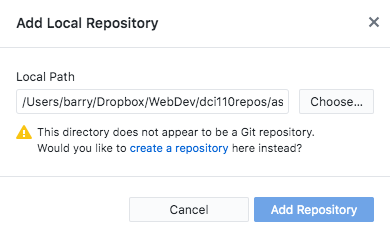
Under local path: use the Choose button to find the directory for your project. Your local path will differ from the above image. After you selected your local path, GitHub Desktop will inform you that “This directory does not appear to be a Git repository. Would you like to create a repository here instead?”
Click on the blue link create a repository.
You should see a window like the following, but with the repository name already filled in:
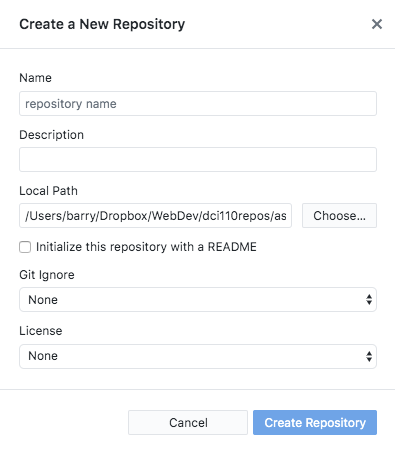
You can leave the description blank.
You can ignore the other options and click the blue button Create Repository.
This will initiate Git version control for your project directory. You should see a window like the following when this step is completed.
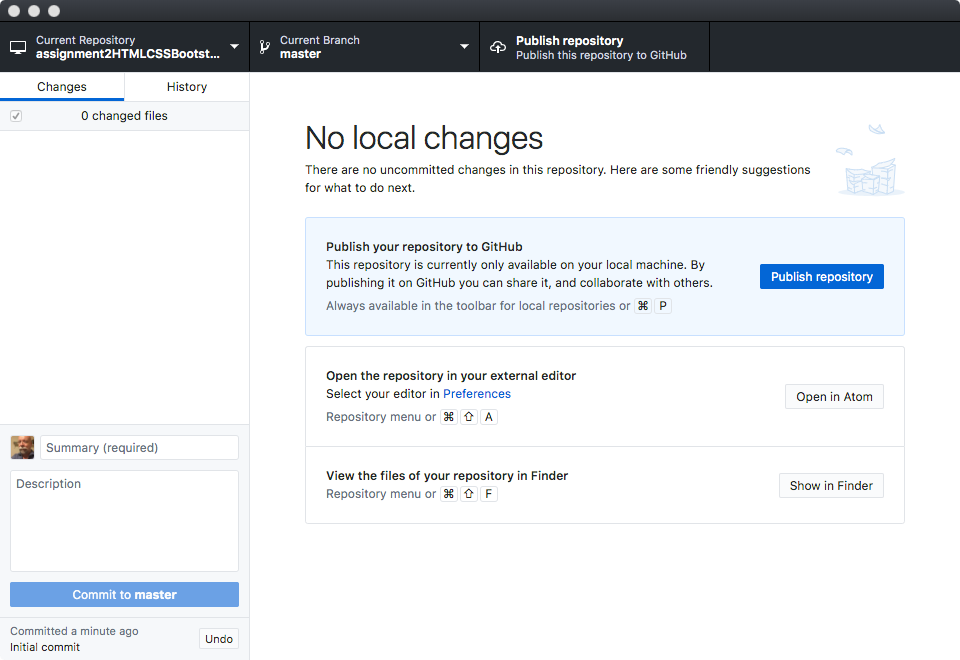
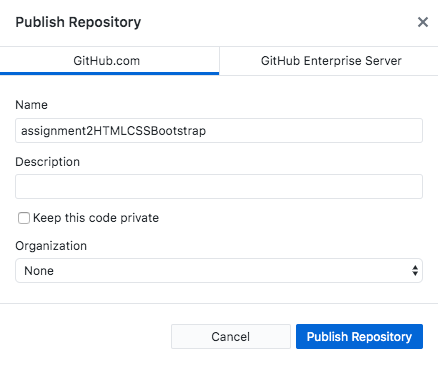
You’ll be working with this window a lot in GitHub Desktop. We’ll come back to it in a later tutorial. For now, you want to push your repository to your GitHub account by clicking the blue Publish Repository button. Another window will popup that gives you an opportunity to rename the repository before uploading it to GitHub. You can also add a description, if you like but you don’t have to. Be sure that the checkbox next to Keep this code private is unchecked. (In many cases, you will want to keep your code private but not for this assignment.) Again, click the blue Publish Repository button when ready. (Choose a name for your repository. The example below was from a previous version of this course.) The repository name should not have spaces or special characters. You can use camelCase, as in the example below. Or, you may use dashes (-) or underlines (_) between words, if you wish.
GitHub Desktop will work for a few seconds in uploading your project directory to GitHub. When completed, your GitHub Desktop should look something like the following:
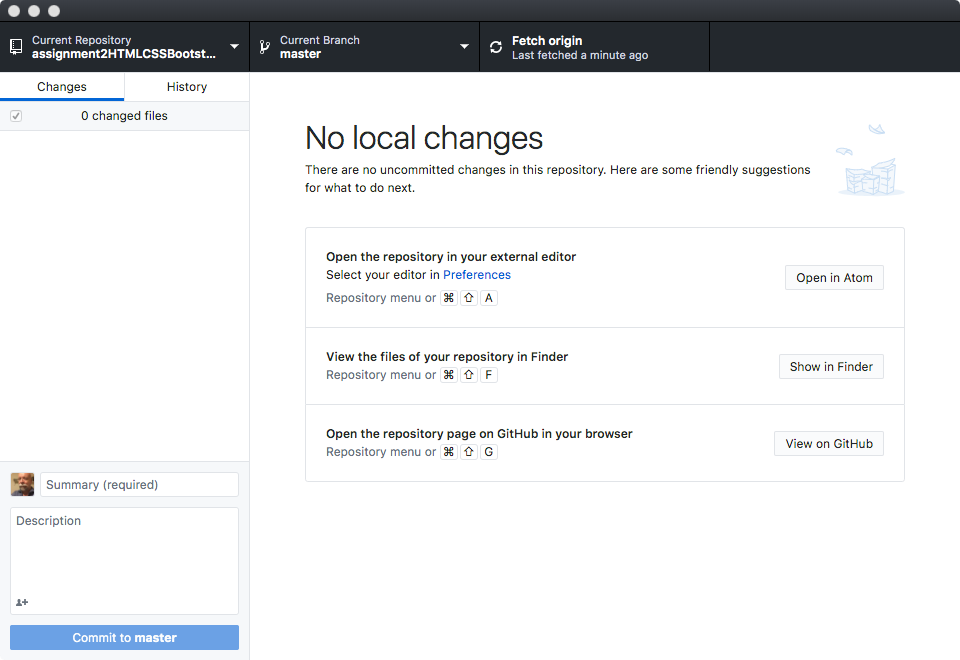
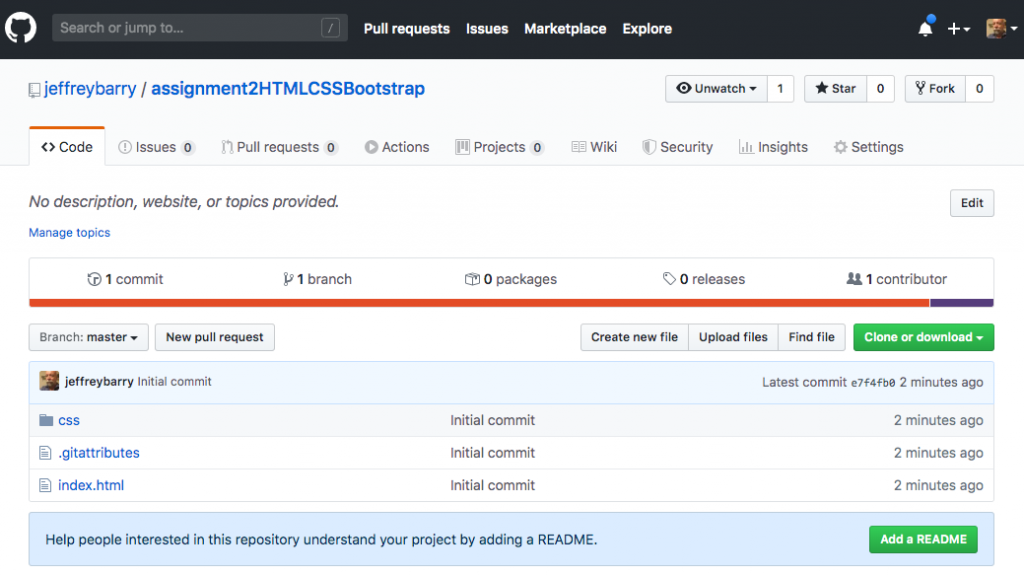
We’ll come back to GitHub Desktop later. But, now, to actually publish your site live on the Web, go to your GitHub account and find the repository you just created. You should see a page like the following, but with your account info:
GitHub Pages
GitHub Pages is a feature that comes free with your account. You should take a look at the official GitHub Pages site for details about all aspects, plus there’s a cool 4-minute video for getting started. But, don’t get confused. GitHub Pages has several ways of doing things. For your specific assignment in this course, my instructions should help you the most.
In your repository on GitHub.com, go the Settings tab. On the Settings page, scroll down until you get to the section titled GitHub Pages:
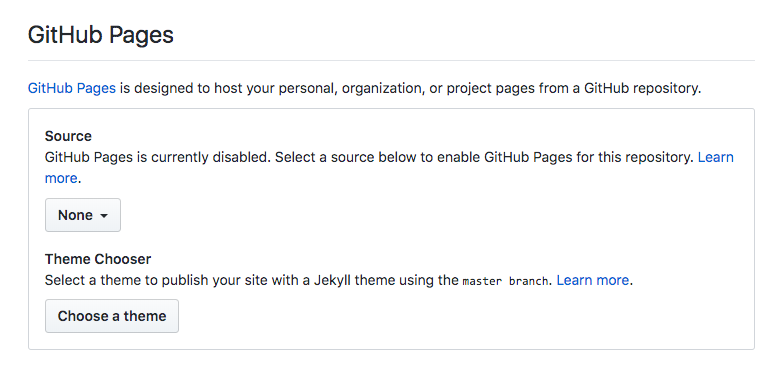
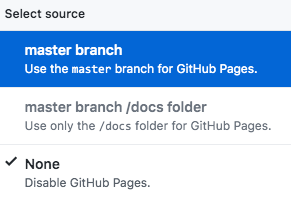
Click on the dropdown menu under Source and select the option Master Branch.
After you select the master branch as the source, then the settings page will reload automatically and display a blue box under the GitHub Pages heading. The box contains the URL to your site. Be patient. It may take a few minutes for your site to start working.
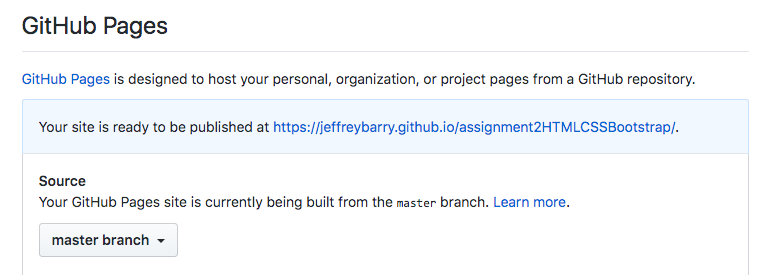
Once your site is active, the blue box will turn green. You’ll have to reload the settings page. Click on the link to go to your new site.

That’s it! Your web site is now live on the Internet. To submit the assignment, send me the URL of your site.