Week 4 notes for DCI 110: Web Programming for Non-Programmers
In video lesson 2, we examined this basic site:
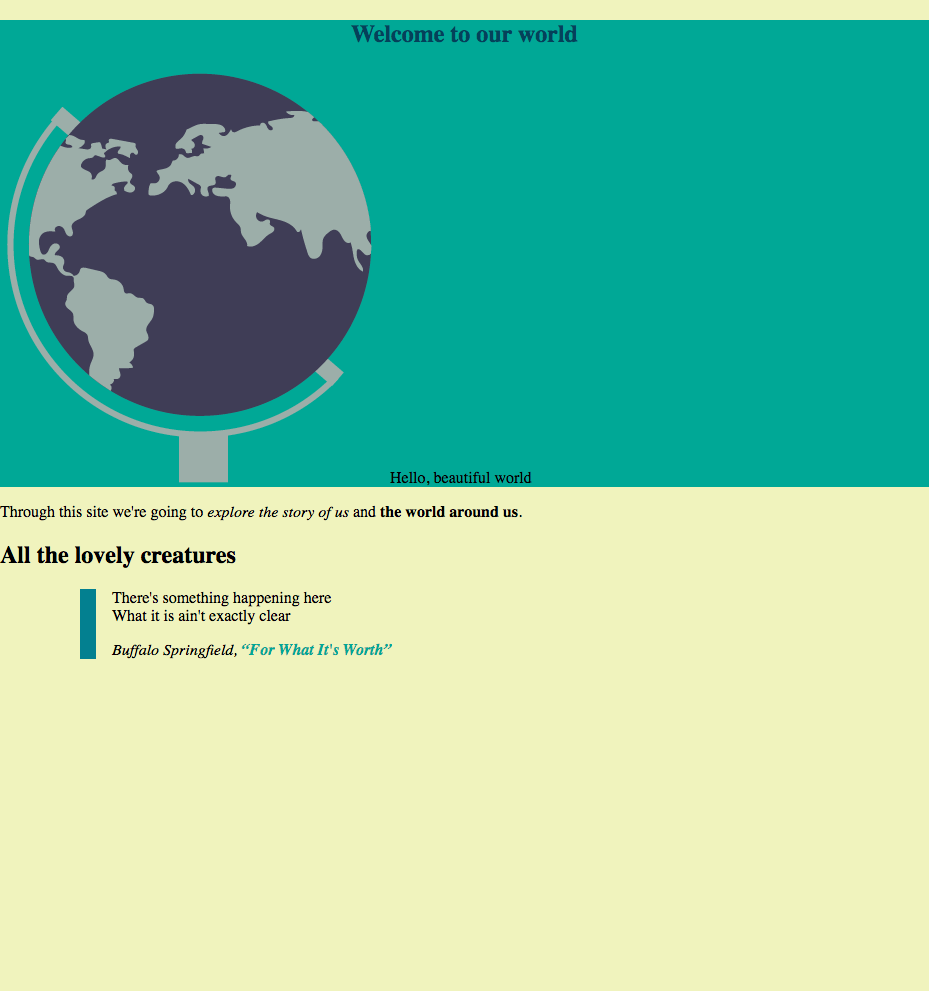
It’s okay, but it has some problems. Notice that yellow bar at the very top? That shouldn’t be there. All the fonts are also bland, just the default fonts. The spacing of “Hello, beautiful world” needs to be higher in that top section. The font sizes are a bit difficult to read and would look better a bit larger.
Let’s make some changes to go from that to the following:
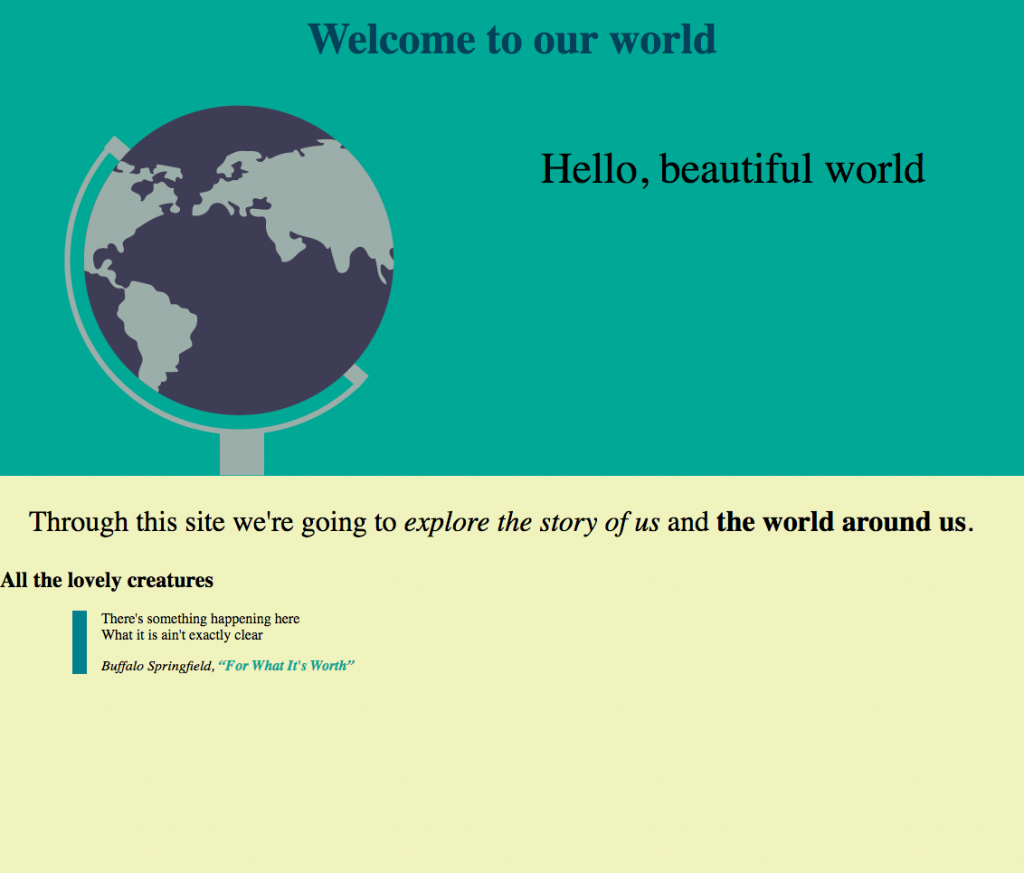
Okay, that looks a bit better.
For this lesson, we’re going to look at the following CSS techniques:
- box model
- font sizing
CSS Box Model
Learning target: I can modify elements by manipulating values defined by the box model.
Understanding the CSS box model is a requirement for advancing further with CSS. A helpful resource in explaining the CSS box model is by Shay Howe: Opening the Box Model. As you read that explanation of the CSS box model, keep the following in mind:
- think of every HTML element as a block; (already see the similarity between a block and a box?)
- every block, i.e., every HTML element, is a rectangular box with content + 5 adjustable properties: width, height, padding, borders, margins.
- the width of a block consists of the the margin sizes (left margin + right margin) + border size (left border + right border) + padding (left padding + right padding) + the size of the content.
- be sure that you understand the distinction between padding and margin.
Stop now, and read about the box model on Shaw Howe’s site. You should also read Chris Coyler’s brief article The CSS Box Model. Then come back here.
Feeling comfortable with the CSS box model? If not, go back and re-read that material.
Okay, let’s review our learning target: I can modify elements by manipulating values defined by the box model.
Modifying elements in the CSS box model
A lot of web design involves manipulating the elements of the CSS box model. It sounds simple, and in some ways it is simple. But the different boxes on a web page can impact each other. Here’s the top part of our page from last week, along with a few annotations:
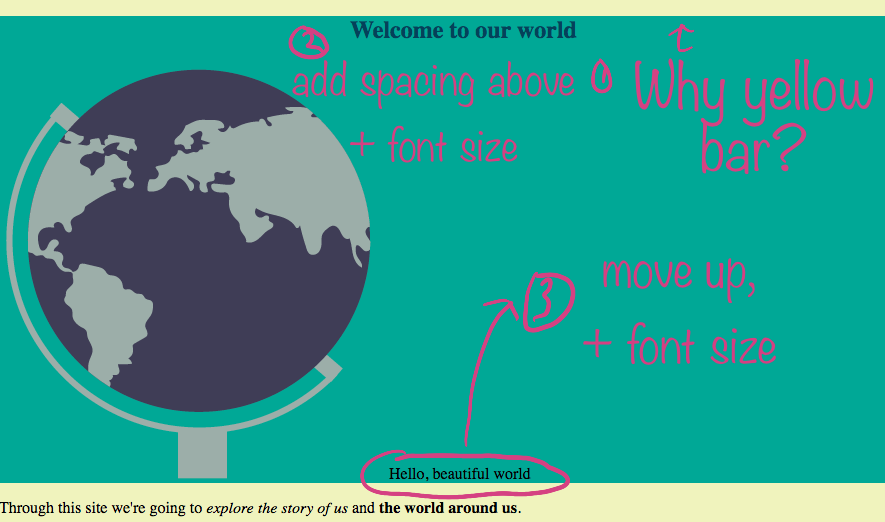
- Why is that yellow bar at the top? It’s not intentional. Maybe it looks okay, but I really wanted the green box to be flush against the top. What’s happening there?
- The h1 “Welcome to our world” is too close to the top of the green box. Let’s give it some space and increase the font size.
- Move “Hello, beautiful world” up and increase the font size.
We won’t worry about the rest of the page for now.
The HTML for the above image (only code for the top snippet of the page is shown):
<body>
  <section id="top">
    <h1>Welcome to our world</h1>
  <p><img src="images/globe.png"> Hello, beautiful world</p>
</section>
Let’s review our first problem question: Why is that yellow bar at the top?
The yellow that we are seeing at the very top is actually the background of the page. Remember that the entire page was set to yellow and that the green box (section top) sits on top of the background. Something is pushing the elements in the green box down on the page to reveal part of the yellow box. What is that something?
This is the common type of troubleshooting you will encounter over and over again in web development. It’s a little puzzle you have to figure out. The steps you want to follow in breaking it down is to take one HTML element at a time to see if it’s the guilty party causing the problem. In this example, our first logical guess is that the (section top) is the culprit. That seems perfectly logical since the green box is being pushed down. But upon closer inspection, we find that it’s not the section tag. And we also find that there’s nothing wrong with the body tag.
Determining that there’s nothing wrong involves looking at the CSS for those elements, plus also using the inspect tool in your web browser. If you were to hover over the h1 with the inspect tool, you will see that a top margin has been added by default. Remember, all browsers add default styles to the elements unless you use a CSS reset. I’m not using a reset on this page; therefore, you can see that the default top margin for the h1 is interfering with the intended design. Rather than going back and adding a CSS reset, I’m just going to modify the margin for the h1. Recall how this is part of the learning target: modifying box elements by manipulating values.
In the CSS, we can use the following to get rid of the margin-top on the h1 that is causing the yellow spacing:
h1 {
text-align: center;
color: #04415A;
margin-top: 0;
}
Let’s review the second problem question: give some spacing to the h1 and increase the font size. How would you increase the spacing above the h1 by 1rem? (Would you use margin or padding?)
For assignment C.5: Provide the CSS code to provide spacing above the h1. Only 1 line of CSS code needs adding to the h1 CSS style specifications above.
Use Canvas to submit your answer for assignment C.5.
How would you increase the font size? Note that this question addresses another learning target: I can specify a typographic hierarchy of font sizes using the em.
For assignment C.6: Provide the CSS code to increase the font size. The default body font size is 16px. We want to increase the h1 font size to 48px, but using only rem and not pixels.
Use Canvas to submit your answer for assignment C.6. It should be just one line of CSS code that is added to the h1 in the CSS style sheet.
If you have trouble answering these questions, then it may be useful if you go back to the video for lesson 2 and copy the HTML and CSS code to create this page and layout. Yes, it’s tedious to copy the code by hand from the video but it will be good practice to make sure you have everything working correctly. By examining the actual code, you can troubleshoot and determine if you have the correct answer.
We will adjust the third problem question, adjusting the spacing of “Hello, beautiful world”, in the next lesson.
Answering the two questions for assignments C.5 and C.6 should improve your confidence for tackling what comes next with CSS.